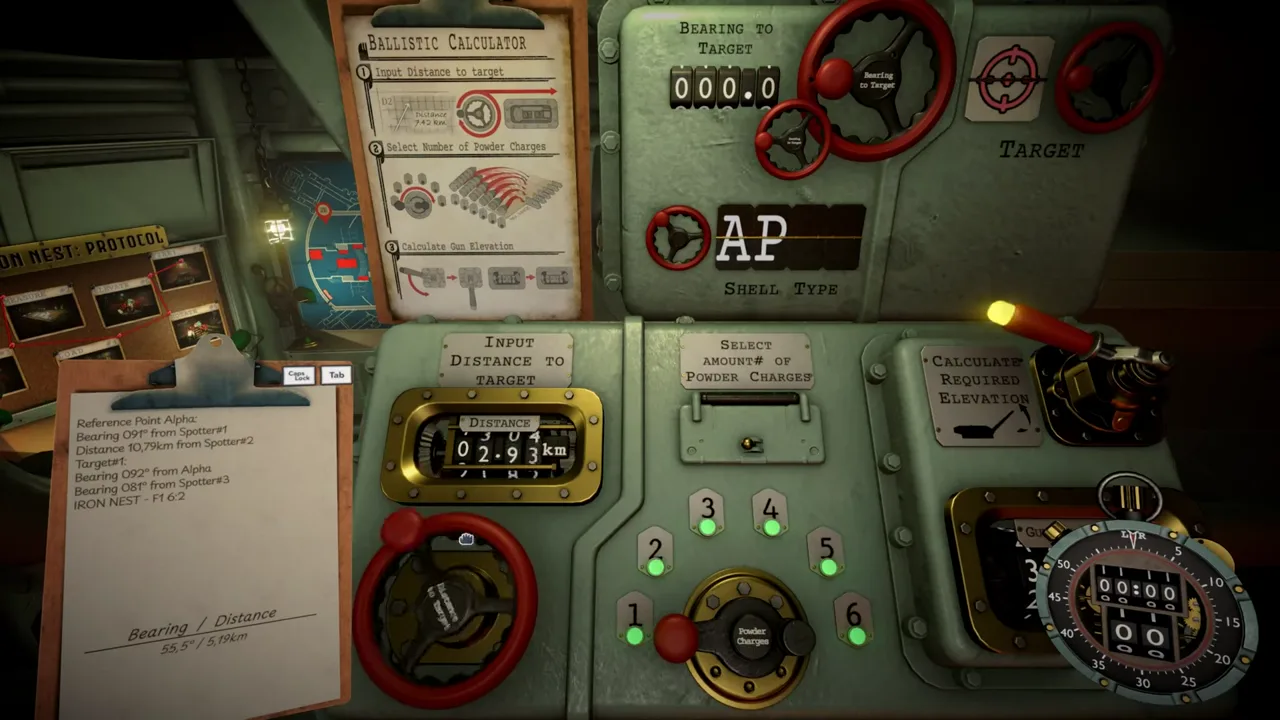
In IRON NEST, distance is calculated on the Tactical Map. Confirm the exact sub-cells of your current Iron Nest and the target, then draw a direct line from the Iron Nest to the target — the map displays the bearing and distance of that line and stores both on the Clipboard. That Iron Nest-to-target range is the value you enter into the ballistic calculator.
One thing trips up new crews: a report such as “Distance X km from Spotter or Reference Point” is not your firing range. It is a target-location condition that you plot first, and only the range measured afterward from the Iron Nest itself belongs in a firing solution.
Measure Distance on the Tactical Map
Precision starts with the grid. Before drawing anything, confirm the exact sub-cell of the Iron Nest marker and the exact sub-cell of the target marker. Landing in the right large cell but the wrong sub-cell is enough to throw the measurement off, because the Tactical Map measures between the points you give it and nothing else.
Draw a direct line from the Iron Nest to the target, starting exactly on the token center. The Tactical Map displays the line’s bearing and distance, and stores that information on the Clipboard so you can carry it to the gun without re-reading the map. The distance figure on that readout is your firing range — the number the ballistic calculator expects.
Keep the bearing and distance together as a pair. They describe the same line, and a solution built from one fresh value and one stale value will miss. This final measurement, taken from the gun’s own position after the target sub-cell is fixed, is the firing range — every other distance in the process only exists to make this one possible.
Turn Spotter Reports into a Target Position
Intel often arrives as a distance from something else. When a report says the target is “Distance X km from Spotter or Reference Point,” treat the named source as the center of a compass circle and the reported distance as its radius. The target sits somewhere on that circle — the report alone does not tell you where, and it is never the firing range.
To fix the position you need a second condition. The intersection of your distance circle with another circle, or with a bearing line, gives you the target position on the map. Our guides on how to triangulate and the Tactical Map walk through that plotting work in detail.
Only after the target is plotted do you calculate distance for the firing solution, and you measure it from the Iron Nest, not from the spotter. The same logic holds whatever the named source is — a spotter or a reference point becomes the circle’s center, never the gun. The spotter-to-target distance that located the target has done its job; the gun needs Iron Nest-to-target range.
From Distance to Elevation
Range, charges and elevation are linked, and distance is the first link in that chain. The range defines the ballistic requirement, the charge count defines the selected solution, and the calculator converts both into the elevation the gun needs. Change the distance and the whole chain has to be recomputed.
For quick work, an early 1.0 community formula expresses the relationship as Elevation = Range (km) × 12 ÷ Charges. It is a community rule of thumb from the launch version rather than an official figure, so treat it as a field expedient. Normal play can keep using the in-game mechanical calculator, or a current-version external calculator, instead of hand-computing — our ballistic calculator guide covers that station.
Distance Errors That Ruin a Solution
Most bad distances come from a short list of habits:
- Right cell, wrong sub-cell. The marker lands in the correct large grid cell but the wrong sub-cell, so the range is off before the line is even drawn.
- Spotter distance treated as firing range. Spotter-to-target distance is a location condition, not the Iron Nest-to-target range the calculator needs.
- Stale Iron Nest marker. Forgetting to update the Iron Nest marker after movement anchors every new measurement at the old position.
- Line started off-center. Starting a measurement line away from the token center skews both bearing and range.
- Half-applied corrections. Changing only elevation after a correction, without remeasuring the new target point, leaves the solution built on the old geometry.
The common thread: when either endpoint changes, regenerate bearing, range and elevation together. Never patch one value and carry the rest forward.
When to Measure Again
Emergency Move invalidates every old firing range. The moment the Iron Nest relocates, each stored distance was measured from a position that no longer exists, and the figures on the Clipboard belong to the old ground.
Make re-measurement part of the move itself. Update the Iron Nest marker, redraw the line to the target, and regenerate bearing, range and elevation as a set. A crew that treats distance as a living value, re-measured whenever anything moves, will outshoot a crew trusting last phase’s numbers.
Frequently asked questions
Is the distance in a spotter report my firing range?
No. A report like 'Distance X km from Spotter or Reference Point' is a target-location condition. Plot it as a compass circle, fix the target position, then measure the firing range from the Iron Nest itself.
What is the quick formula to convert distance into elevation?
The early 1.0 community formula is Elevation = Range in km x 12 / Charges. The in-game mechanical calculator or a current-version external calculator can do the conversion instead.
Does moving the Iron Nest change measured distances?
Yes. Emergency Move invalidates every old firing range, so update the Iron Nest marker and regenerate bearing, range and elevation after any move.